ScanAsyst®* Mode AFM using MikroMasch® SelfAdjust-Air AFM probes
How to use MikroMasch® SelfAdjust-Air AFM probes in ScanAsyst®* mode on Bruker Nanoscope software
This is a detailed step-by-step instruction on how to use SelfAdjust-Air AFM probes when doing AFM in ScanAsyst®* mode on Bruker AFM systems.
Below you will find screenshots and comments on the procedure:
Follow these steps:
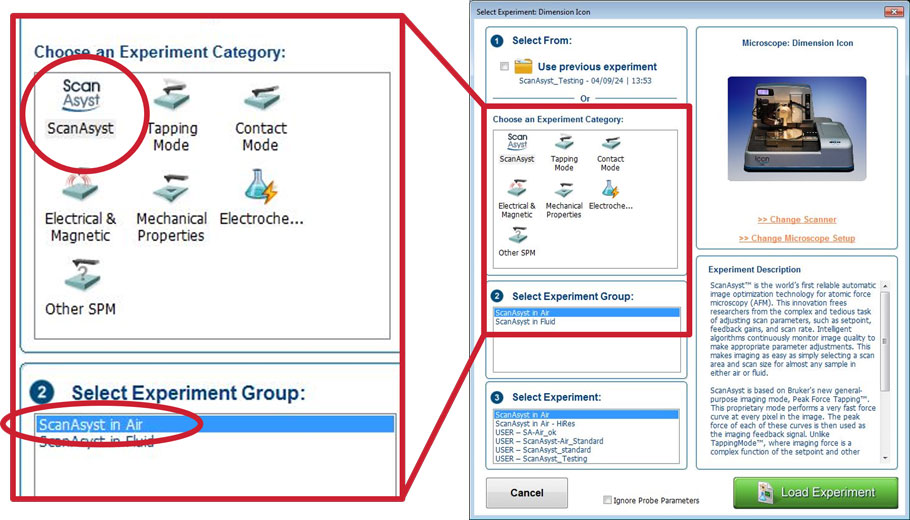
Step 1. Select AFM Experiment
- Mount a SelfAdjust-Air AFM probe into the AFM probe holder
- Select ScanAsyst® in Choose an Experiment Category
- Select ScanAsyst® in Air in Select Experiment Group
- Select ScanAsyst® in Air in Select Experiment
- Press Load Experiment
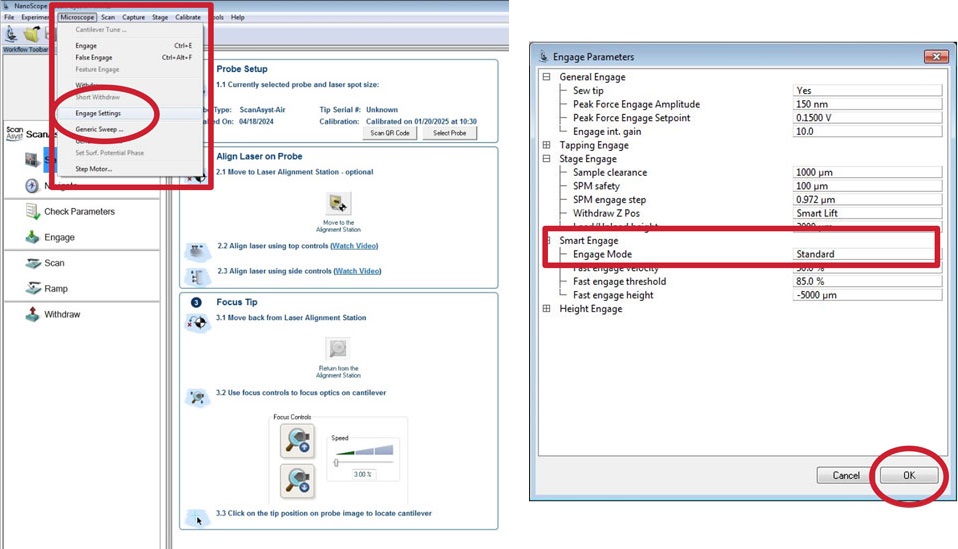
Step 2. Disable Smart Engage
- Select Microscope from the main menu and then select Engage Settings
- In the Engage Parameters window expand the Smart Engage section and set Engage Mode to Standard
- Press OK
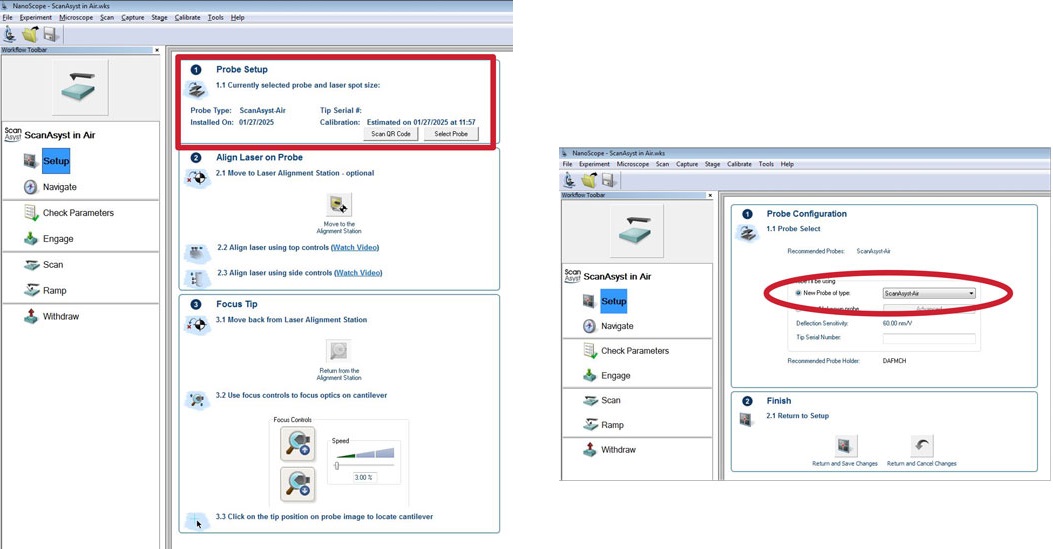
Step 3. Select an AFM Probe Type
- In the ScanAsyst® in Air window go to Setup, Probe Setup and press Select Probe
- In the Probe Configuration section select New Probe of type and then select ScanAsyst-Air
- In the Finish section press Return and Save Changes
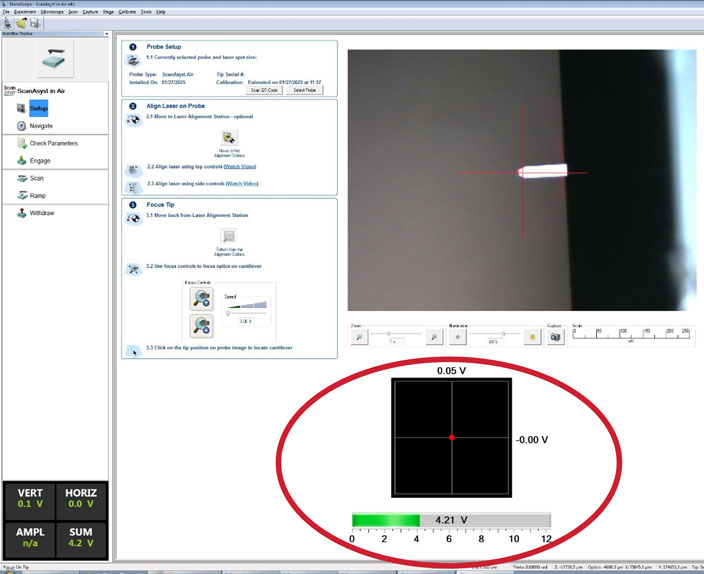
Step 4. Align Laser and Photodetector
- In the Setup window observe the SUM signal and the laser position in the photodetector window
- Using the laser control knobs align the laser spot near the free end of the AFM cantilever so as to maximize the SUM photodetector signal
- Using the photodetector knobs align the laser spot at the center of the detector
- In Focus Tip use the Focus Controls to focus on the AFM tip
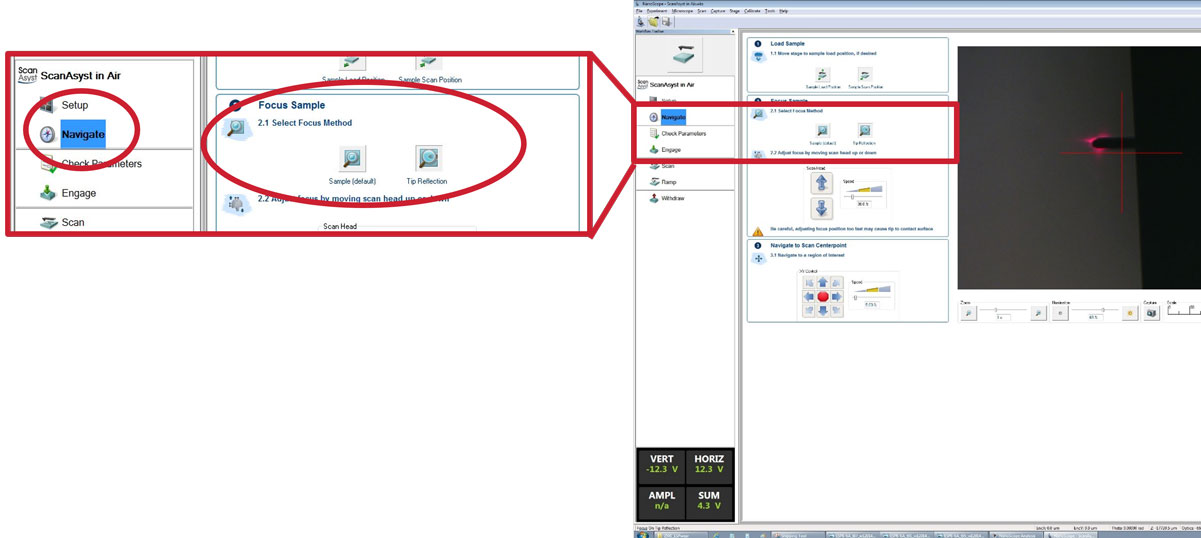
Step 5. Focus on Sample
- In the ScanAsyst® in Air window go to Navigate
- Go to Focus Sample and Sample (default)
- Use the Scan Head arrows to focus on the sample surface
- Be careful not to crash the AFM head into the sample!
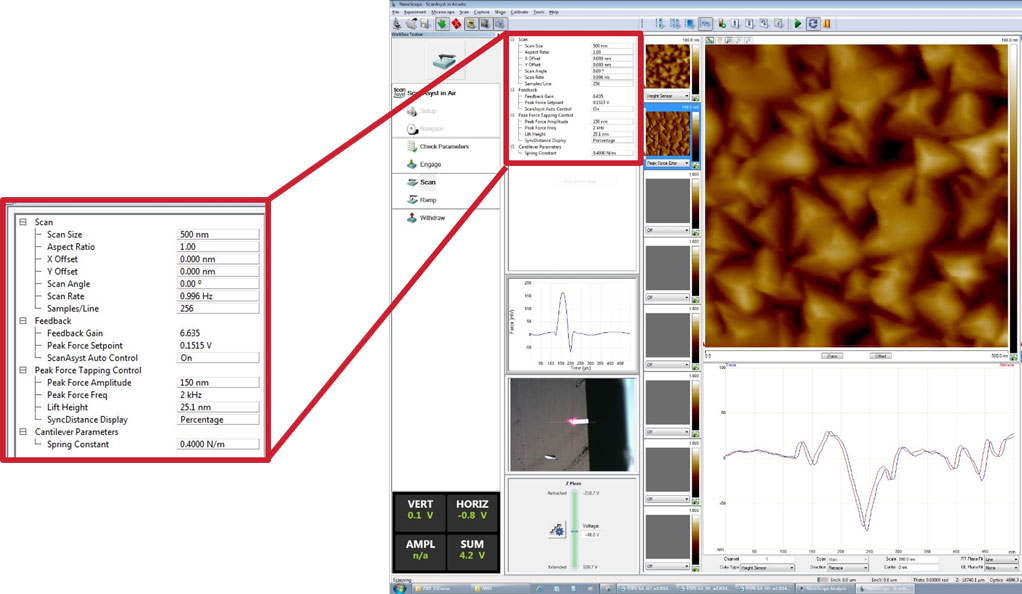
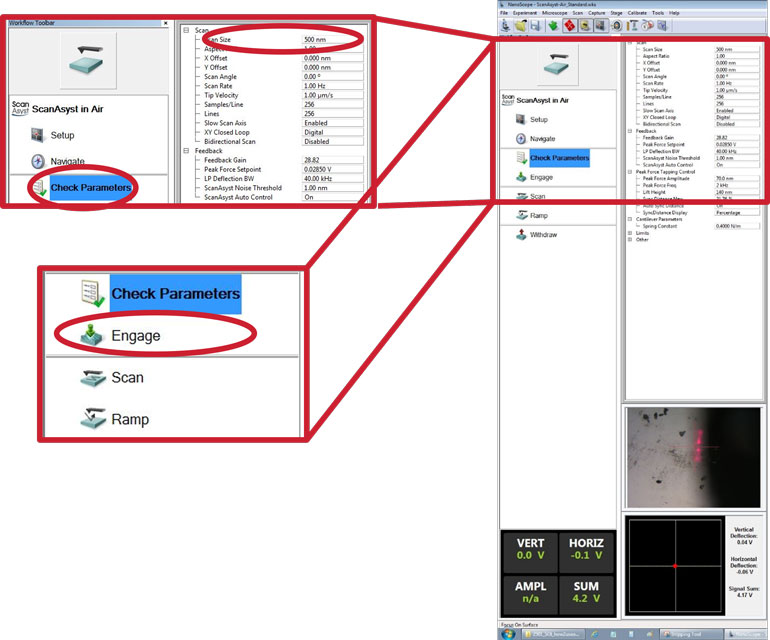
Step 6. Check Scan Parameters and Engage
- In the ScanAsyst® in Air window go to Check Parameters
- Select the desired Scan Size, Scan Rate, etc.
- In the ScanAsyst® in Air window press Engage
Step 7. Scan the Sample
- Scan the sample
- Check and adjust Scan Size if needed
- Check and adjust Scan Rate (i.e. scan speed) if needed